Designing a small bathroom can be a challenging task, but with the right tiling ideas, you can create a visually appealing and functional space. In this comprehensive guide, we’ll explore various tips and ideas for tiling small bathrooms, covering everything from tile selection to layout and color schemes.
Tile Selection
Choose Light-Colored Tiles: Light colors, such as whites, creams, and pastels, can make a small bathroom feel more spacious and airy. Light-reflecting tiles contribute to the illusion of a larger space.
Use Large Tiles: Opt for larger tiles to minimize the number of grout lines, creating a more seamless look. Large-format tiles can visually expand the room by reducing visual clutter.
Consider Glossy Finishes: Glossy tiles reflect light and create a sense of openness. However, be mindful of slip resistance, especially in areas prone to water splashes.
Subway Tiles: Classic subway tiles can be a great choice for small bathrooms. The elongated shape can visually stretch the walls, creating the illusion of height.
Layout and Pattern Ideas
Diagonal Tile Layout: Installing tiles diagonally can trick the eye into perceiving a larger space. The diagonal lines draw attention away from the room’s size and add visual interest.
Vertical Patterns: Vertical patterns, such as vertical stripes or stack-bonded tiles, can make the walls appear taller. This is especially effective in bathrooms with low ceilings.
Feature Wall: Create a focal point with a feature wall using a different tile color or pattern. This draws attention away from the size of the room and adds a touch of personality.
Hexagonal Tiles: Hexagonal tiles can create an interesting visual effect. Install them in a honeycomb pattern to add a unique and modern touch to your small bathroom.
Grout Considerations
Match Grout Color to Tiles: Choosing a grout color that closely matches the tiles helps create a seamless appearance, reducing the visual impact of grout lines.
Use Thin Grout Lines: Opt for thin grout lines to minimize visual interruptions. A more delicate grout line creates a more cohesive look and allows the tiles to blend.
Contrast with Dark Grout: While matching grout can be a safe choice, using a dark grout with light tiles can create a striking contrast that adds depth to the design.
Tile Placement and Direction
Continuous Flooring: Extend the same tiles from the floor onto the walls or shower area to create a constant, unbroken visual flow. This can make the space feel more cohesive and less segmented.
Vertical Stacking: Install tiles vertically to draw the eye upward, giving the illusion of higher walls. This is particularly effective when using rectangular tiles.
Border or Inset Tiles: Introduce a border or inset of differently colored or patterned tiles to break up the monotony. This can add visual interest without overwhelming the space.
Niche and Storage Solutions
Recessed Niches: Consider incorporating recessed niches into your shower or bathroom walls. These can be tiled to match the surrounding walls and provide storage space without taking up valuable floor space.
Floating Shelves: Install floating shelves made of the same tile material to maintain a cohesive look. These shelves can be both functional and decorative, offering storage without making the room feel cramped.
Mirror and Lighting Tricks
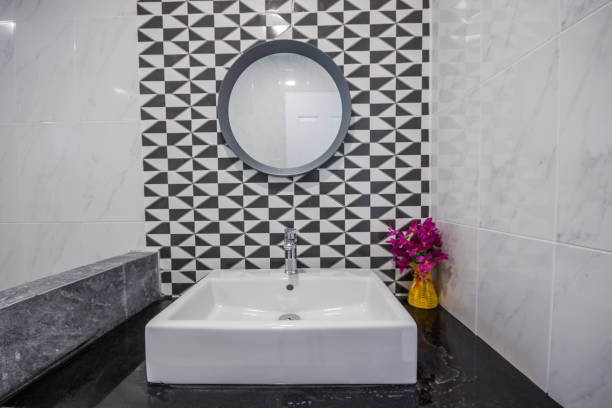
Strategic Mirror Placement: Place mirrors strategically to reflect light and create the illusion of additional space. Consider a large mirror above the vanity or a mirrored wall to expand the room visually.
Ample Lighting: Adequate lighting is crucial in small bathrooms. Combine natural and artificial lighting to brighten the space. Consider wall sconces, recessed lighting, or pendant lights to avoid shadows.
Color Scheme
Monochromatic Palette: Stick to a monochromatic color scheme to create a cohesive and harmonious look. This doesn’t necessarily mean all white; you can choose different shades of the same color family.
Accent Colors: Introduce small pops of color through accessories or accent tiles. These accents can add personality without overwhelming the space.
Neutral Tones: Neutral colors, such as beige, gray, or soft greens, can create a serene and timeless atmosphere. They also provide a versatile backdrop for other design elements.
Seamless Transitions
Curbless Shower: Consider a curbless or walk-in shower to eliminate visual barriers and create a seamless transition between the battery and the rest of the bathroom.
Floor-to-Ceiling Tiles: Extend tiles from the floor to the ceiling to create a sense of continuity. This helps avoid visual breaks that can make the room feel smaller.
Optimize Layout and Fixtures
Space-Saving Fixtures: Choose compact and space-saving fixtures, such as wall-mounted toilets and vanities. This frees up floor space, making the bathroom feel less cramped.
Corner Fixtures: Utilize corners effectively with corner sinks or corner showers. These fixtures can maximize space while maintaining functionality.
Maintenance and Longevity
Choose Durable Materials: Opt for durable and water-resistant tile materials, especially in areas prone to moisture. This ensures longevity and reduces the need for frequent replacements.
Easy-to-Clean Grout: Select grout that is easy to clean to maintain a fresh and hygienic appearance. Epoxy grout, for example, is resistant to stains and requires less maintenance than traditional grout.
In conclusion, designing a small bathroom with the right tiling ideas involves a combination of visual tricks, thoughtful layout planning, and a keen eye for detail. By carefully selecting tiles, patterns, and colors, you can transform a compact space into a stylish and functional oasis. Experiment with these tips to find the perfect balance between aesthetics and practicality for your small bathroom.